If want to know what we scurrilous damp, timber and wall tie specialists do all day, here’s a snapshot of a typical day in and around Leeds (apart from the tyre puncture, which meant one survey was dropped; I’d usually do at least four).
I’ve chosen this day because it has a nice bit of variety, with one or two interesting things to look at for you and I was joined on it by Dr Bev West; senior lecturer in building surveying at Leeds Metropolitan University.
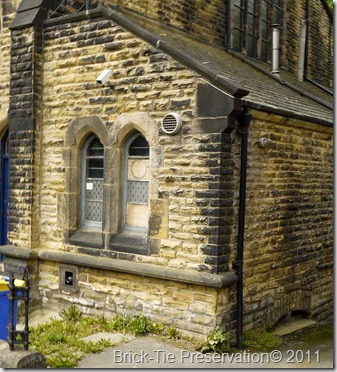
After picking Bev up at Leeds station and fixing my flat tyre, a church in Headingly, with rot problems, was our first call.
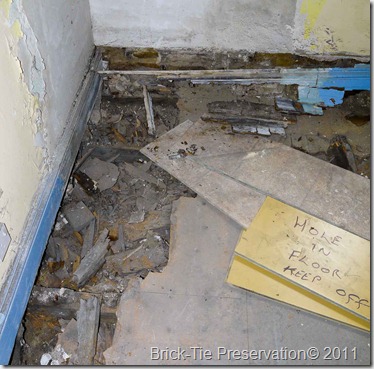
The image is of the floor in a rear annex, severely decayed by wet rot. The rot is in the floorboards, joists and the wall plate. Heavy infestation by Wood Boring Weevil has combined to soften the timber down to a crumbly mass.
There’s a problem here, because the sub-floor void is very narrow, with the lower section of the joists just kissing the brickwork vault below it (there’s a nice vaulted cellar directly below the room).
The room has two external walls and the other two walls are internal dividing walls which go down to the cellar floor – no chance of creating a nice through draft under this floor. The decay is a natural result of years of damp conditions and occasional plumbing leaks; including the recent one.
Treatment?
Just remove the decayed floor and install a new one using VAC-VAC timber to take account of the fact that it is unlikely that the improvements in sub-floor ventilation, will offer more than a modest improvement. It’s possible that some of the sub-floor timbers will still have a relatively raised moisture content; at least for some of the time.
The wall plate will be extracted and made-up in masonry; a timber one can’t be protected in the very think and damp external walls. We’ll install some more air bricks and encourage air flow via the cellar window too (with some vents in the soffitt of the vault).
There’s much more that could be done; the roof, gutters and external walls are in dire need of some TLC. However, my brief on this one is narrow and my client only has the funds to tackle the urgent structural problem.
Other points to note on this were a recent pipe burst, which has saturated the walls and means that any meter readings are not very helpful. I’ve recommended a drying regime using a combination of air shifting and desiccant dehumidifiers, though I will not be directly involved in that.
It’s gone lunchtime – off we go.
Timber survey
Second appointment is a house in North Leeds. A timber survey for a prospective purchaser and a chance for me to demonstrate my X-ray vision (all surveyors have it).
This house has been extended twice. The new extensions have doubled its size. The original floors are suspended timber over a nice deep sub-floor void. The extensions have concrete, floors with an insulated floating floor over. Sub-floor ventilation has been reduced by this; there’s no ‘through draft’ since the sub-floor environment is dead, because there are air bricks buried below the new extensions and that only leaves two remaining air bricks for a 35M2 floor area.
Okay, what with the above, we’re on notice of potential sub-floor decay, so Bev watches as I stomp about the lounge, like a gorilla. Bingo, the ornaments in the bookcase jingle and the telly wobbles.
I explain that I’m concerned and need to check; though I reassure the vendor “Could just be loose packing’s or a joist spanning over a sunken ‘sleeper wall’.
Bev knows we’re onto something.
I pop one floorboard, where an electrician has installed a new socket above and reach for my mirror. A quick look with this and a torch confirms my fears; widespread and very severe wet rot in the floor joists.
A hand mirror and torch is way better than a boroscope for this job – the powerful directional beam of light, reflected via the mirror can be used to check the ‘squareness’ of the joists.
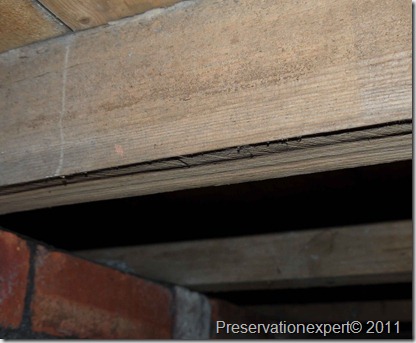
Damage by Coniophora puteana can vary in it’s appearance and where it happens due to poor sub-floor ventilation, as opposed to say rising damp, wetting the joist ends, it can manifest as above.
The surface of the timber is perfectly sound and there is only a hint of visible fungus and no cracking. No fruiting body (quite rare with this wet rot and it needs to be pretty wet to grow one).
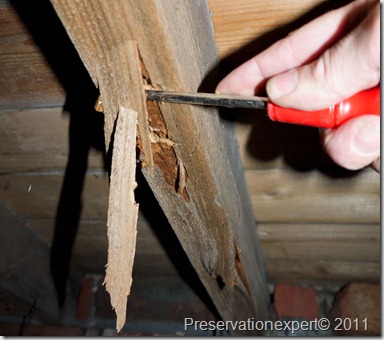
However, shed a directional beam of light across the bottom edge of the joists and along the sides and there is often a clear warning of trouble. The timber is being consumed by the wet rot fungus from within and this causes the timber to shrink. The sound outer surface stretches and buckles; with the bottom ‘cupping’.
This concave surface is not prominent if you look directly at the wood. Shine a light across the surface though and the undulations are thrown into sharp relief – the joist is very well rotted for this to be seen.
I said ‘widespread decay’ for two reasons: I can see a few joists from where I have lifted the board; they’re all the same and; this type of decay symptom is rarely confined to a single joist or part of a joist. Think about it; the sub-floor void is a dark and quiet place, no wind, and it is normally a very stable environment. If conditions are such that joists, which are not touching anything but the air, are reaching a high enough moisture content to allow wet rot to thrive, then these conditions are likely to apply throughout the sub-floor area.
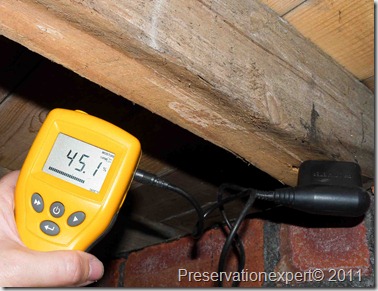
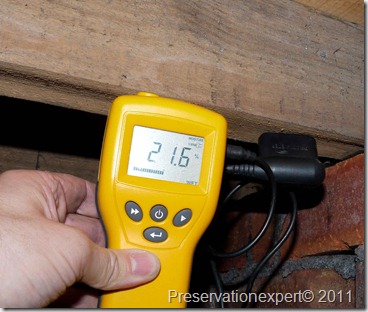
However, as can be seen below, the moisture content varies quite a lot under this floor (I took several readings). I believe that this is more to do with the natural variation of timber density and permeability than widespread differences in the humidity (maybe Graham Coleman could shed some light on this?); The joists below are sat on a ‘honeycombed’ sleeper wall, with a perfectly healthy bitumen DPC.
As a commercial damp and timber specialist, with work to do, I’d usually pop the board down and that’s that. However, although Bev has had a go with the mirror and is chuffed to see the symptoms I’ve described, I want her to get full benefit from her day with me.
So I get out the saw and widen the access. The images confirm the problem and better still I get some dramatic shots of joists so rotten I push my screwdriver through them. I rip off some big chunks and Bev begs them from the bemused but remarkably calm vendor, for display to the Building Surveying Students in Leeds (what’s she like?).
The extent of decay will vary a little; some joists will have a higher sapwood content than others, but really, we’re usually talking a new floor or thereabouts.
Other things we see are a clay over-site with cracks and crevasses in like the moon. The sub-floor walls display a thick layer of efflorescence too, so damp has been rising up them and evaporating (below DPC level) and there’s some ‘crust’ on the soil. This leads me to question the vendor about flooding and he confirms that there was ‘very bad damp’ before he bought it.
I’m guessing, but it seems likely that the site/sub-floor has been flooded, (pipe burst?) before or maybe we get cyclical wetting in winter. What with the poor sub-floor ventilation, it’s taken forever to dry out and never fully dries. The soil is dust-dry today.
Treatment?
There is none. – the timbers are completely rotten. New floors aplenty and as many larger air bricks as I can fit in. I’m happy that I can improve the ventilation enough so that with treatment (thorough spray with Safeguard’s ProBor DB), the new floors will have a much longer life than those we’re removing and will serve my client for decades.
So, without lifting the floor and shining the light we could have missed this decay. But you cannot always lift boards or look at every bit of timber in a house; time is short, vendors may not cooperate, you may be having a bad day. There are lots of reasons this decay could have been missed. It wasn’t though and it has nothing to do with my X-Ray vision. The essence of good timber surveying is here; you search for the ‘causes’ and symptoms of decay and then when you find these (in this case very poor sub-floor ventilation, combined with slight deflection in the floor), you then look closer.
The unsung hero here is the Chartered Surveyor who requested the timber survey in the first place. Clearly he was concerned about the ventilation too; maybe he heard the tickled warning from the bookcase? Some vendors tell me ‘the surveyor called you in, to cover his arse”. The truth is that he’s covering his client’s arse really and in this case he did a great job. He even recommended that the buyer use a Property Care Association member – nice one.
Wall Tie Survey
Right then, it’s gone 2:00 PM; off to the next appointment, which is a cavity wall tie survey near Harrogate.
This one is not straightforward. A detached bungalow built in brick with a binding matrix of black-ash. Ideal wall tie corrosion scenario.
However, the house only has an apron of cavity wall, with most of the upper area solid brick with a roughcast render – painted. let’s face it, the bricklayers of the thirties looked on a cavity as a new fangled nuisance – “Don’t need that where we’ve got render; that’ll keep the damp out”.
There’s a single story cavity brick extension too; pre 1980 we think, and insulated with blown fibre.
A walk round and I’m pointing out the black ash and the fine horizontal cracks in some of the lower bed-joints. A quick pass with a metal detector reveals that thick section ties are in the beds which are cracked – bingo!
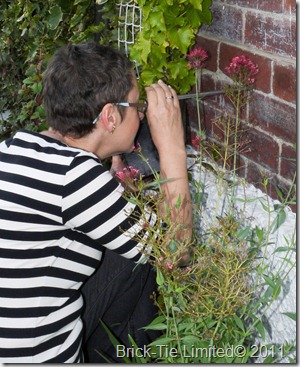
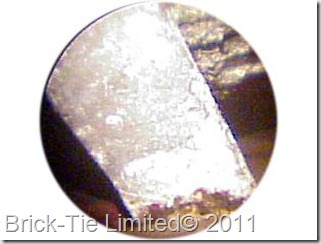
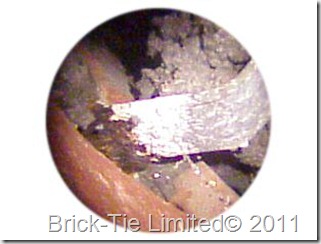
Four holes are drilled and I’ve enclosed a couple of the best images here. Okay, we’ve all seen rusty wall ties. But I’ve included these because they tell a nice story. Notice that the metal at the bottom of the images is very rusty? This is the outer leaf. Look higher and the metal is pure white and reflective; that’s the zinc oxide rust. Above that and we have reasonably good zinc coating; for 80 year old wall ties anyway.
This tells me that the wall tie corrosion is aggravated by the black ash. If the ties were just poorly galvanised I’d expect to see rust, remote from the outer leaf. It’s not unusual to see all of the metal red with rust in those cases. Note here though, the ties have survived pretty well, other than where the moist external bed-joint is touching the tie.
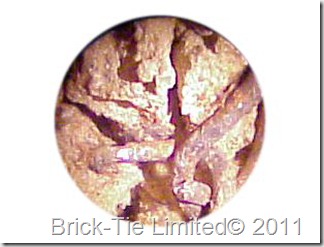
For example I also looked at the galvanised wire ties in the extension,. See that the metal has a few little rust pits coming through the zinc? This is due to inadequate zinc thickness (sorry about the poor image – insulation is a pain).
So what does this mean?
- Black ash = possible wall tie corrosion (lots of this in Yorkshire, where I practise)
- Horizontal cracks, which correspond to the tie positions = severe corrosion of thick section ties.
- Healthy looking post war pre-80’s house = bugger all; it has to be checked in the cavity; you cannot make any assumptions.
Treatment?
New remedial wall tie system for the main house with removal or isolation of the old ties.
Whilst the corrosion in the extension butterfly’s is early stage, these ties are thin section and don’t have the luxury of lots of spare metal, which fishtails have. They also do not produce warning of a problem before failure (cracking). On balance my advice would be to install a supplementary remedial system here; due to this and the fact that our attendance is required for the main house, so it will be very economical for the client to extend the work and incorporate the extension whilst we’re here.
If the extension is left out, it will last a few more years, but it will probably be forgotten about and may manifest itself much worse later on. In saying that, if the extension was the whole house; I’d be happy to recommend monitoring and schedule repairs for later. The Wall Tie Installers Federation is a useful place to find wall tie specialists all over the country.
I do hope that any surveying students out there find the above useful. Much of the basic knowledge I have passed on today, came to me from Jeff Holdsworth; a great guy who worked with me in my early twenties. He was trained by Ken Exalby and so knowledge passes on.
Do something good with it.
Dry Rot.
Hi Bryan I had a fantastic day yesterday. It was brilliant to get out there and remind myself what a building is! Seriously when I got on the train I wrote down notes – just in single sentences – things that I’d learned and I was scribbling away for ages. It was immensely useful and will improve my building pathology lectures no end, so thank you very much indeed.
Bev
Hi Bryan,
Interesting article – thanks for sharing!
Did you give prices on the work required to rectify the situation in each of these surveys?
I’m wondering what your estimate was on the suspended floor replacement.
Thanks,
Ben
Hi Ben,
Yes, I did provide a detailed specification and quotation for the wet rot repairs, through Brick-Tie Preservation. The prices are confidential because both quotes are still ‘live’ so I can’t say. However, VAC-VAC timber is a bit more expensive than untreated so that increased the cost on the first one – justified though, due to the probibility of continued raised moisture content.
Thanks for looking in, I hope you find something useful here.
Dry Rot
.
I see you are a contractor from Bedford – I hope business is good.