Before reading this, it may help to look at the preamble in part 1.
Part 2 moves on from damp visible as mould on clothes, walls and ceilings and goes onto damp coming into the property from outside the house. Specialists and surveyors refer to this as ‘Penetrating damp’. Of course this means the damp is penetrating through the outside wall, but there are many reasons why this can happen.
Lets first think about how houses are built. Usually four walls and a roof, designed to keep the weather out. Of course, in the UK and particularly Yorkshire (my neck of the woods), wind and rain conspire to break through these defences and cause damp.
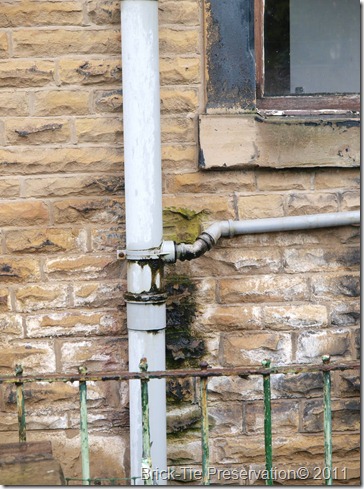
You’d think that penetrating damp was worst at roof level, not necessarily; pitched, tiled and slated roofs are a wonderful invention and when they do fail, the cause is usually obvious; a blown off slate and water dripping through the ceiling. If a roof is in reasonable condition, water runs off it. This can be were most penetrating damp problems start, with overflowing gutters, blocked downpipes and defective pointing or masonry.
So what does penetrating damp look like?
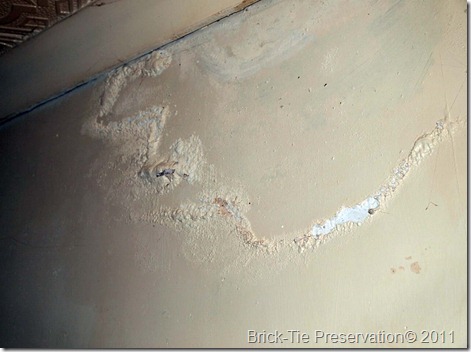
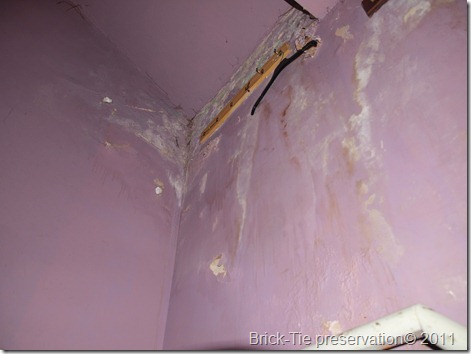
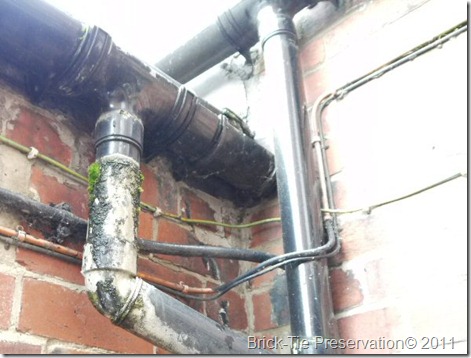
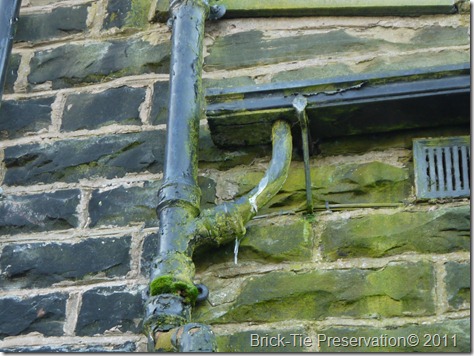
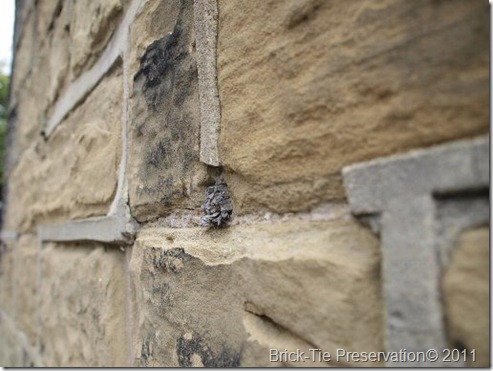
I’ve enclosed some images of typical penetrating damp issues, on houses in Yorkshire, but it will look the same almost anywhere. One common feature to look out for is disruption of the plaster surface; salting or crumbling plaster. This is due to the minerals dissolved by water as it comes through the wall. Water is a solvent and will readily dissolve a variety of free chemicals in the plaster, masonry and mortar beds. By the time the water reaches the inner surface, it is often full of these. When evaporation happens, the minerals are left behind, so if there is a long term cycle of rainwater, passing through the wall and into the house, surface damage, rather than just a moist patch, is often seen.
Some of these damp problems can be tricky to diagnose, but most are really very easy. Just take a good look outside the effected wall, preferably when it is raining. You’re looking for the obvious first, eliminating one cause at a time.
Is there a gutter leaking above the damp? Is it overflowing (grass growing out of gutters is a great tell-tale for this). If not, is there an overflow pipe from a toilet or heating system? Maybe a condensing boiler discharge pipe?
If there are none of the above, have a look at the wall itself. Which way is it facing? If it faces in a westerly direction it probably gets more driving rain when it is windy. Rain traveling at an angle with the wind will want to quickly soak into a wall. What stops this happening to excess are too things:
- The outer surface
- The cavity (if there is one).
The outer surface.
What is the stone, Brick or render like? Have a poke with screwdriver. You are looking for damaged surfaces, cracks and erosion. Sometimes walls which get a lot of weather stay wet in winter and the freeze thaw cycle breaks the surface away. This is called ‘Spalling’.
Spalled surfaces absorb much more water than healthy ones, because water gets behind the surface and then doesn’t evaporate easily. This means that the wall gets wet easily and dries slowly. In winter this may mean that the wall is never really dry and there is a constant movement of water, through to the inner plaster.
Where render is concerned there are other things to look out for. Cracks obviously, but also paint and coatings. If paint is bubbled or coatings are hollow or cracked, they too, just trap water in, with only one way to go – into your house.
Tapping render gently with a hammer is a useful check (this is called hammer testing – yes really). If the render sounds hollow then alarm bells should ring. Hollow render works in just the same way as peeling paint does, trapping water in the wall. The hollowness may be due to a poor application method, though usually it is due to the render being too hard. Very hard cement based renders are quite brittle and expand and contract at different rates to the softer, underlying brick or stone. This ‘differential’ movement causes stress at the point where the render is in contact with the wall. The battle is won by the render, which in effect tears the surface of the wall and the bond is broken. One mistake is thinking that hard render is better than soft – it’s not.
Pointing is the mortar between the bricks or stones. It should be intact, with no holes or gaps. Don’t worry too much if it is on the soft side and can be scratched with a screwdriver. Very hard pointing is not a good idea because it too, traps water in the wall. For guidance the pointing should be at least as thick as the height of the gap between the stones or bricks. If it is thinner, it can easily break away and allow water directly into the wall.
One other cause is just very porous brick or stone on a very exposed elevation. This can be diagnosed by an experienced surveyor. It can also be tested for, using a karsten test. Which is basically just a fancy set of test tubes which are open both ends. On end is sealed to the wall and the other filled with water. The rate at which water soaks into the wall can be timed to get a guide of how porous the wall is.
Cavity wall.
All the above apply to cavity walls just the same as solid ones. However, cavity walls are much more tolerant of external defects. The outer skin of the wall is independent of the inner skin, where your wall plaster and decorations are applied. In effect, the outer leaf of stone or brick, could become pretty saturated, with no sign of this inside the house. This is what cavity walls are for.
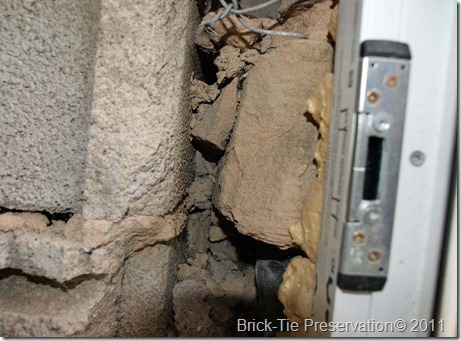
However, we are talking about a building, not a nuclear reactor. Quality standards on building sites are not that well supervised. As a result, the cavity may have rubbish, like mortar droppings, bricks and stones in it. These foreign objects form a bridge across the cavity, which allows rainwater to pass, straight through to the inner surface. One clue to such problems may be the position of retrofitted vents and ducts in a cavity wall. If the damp patch is under an extractor fan, below a boiler vent of next to the joint between a new extension and the old part of the house – check for blockages.
Almost all cavities have some debris in them. However, if the external surface is in good order and there are no leaks and such, there’s usually no problem with ‘bridging’. If external defects are present, fixing them will usually be sufficient, without the need to open up the cavity and clear the debris.
However, sometimes debris may be plentiful or the wall may just be very porous or exposed. There are water repellents which can help, such as Deepshield, which makes porous brick and stone water repellent for years. This is often worth trying.
The ultimate solution is to open-up the cavity and remove the debris. Locating the debris can be done using a combination of methods. If the damp is very clearly defined, no fancy equipment is needed; the blockage is shouting out its position. However, sometimes a boroscope (fibre optic device inserted into drilled holes), will do. If the cavity is insulated, thermal imaging can help; the section of wall which contains the blockage, will be bleeding heat and this will show on the image.
Insulation is rarely the cause of a bridging problem. Though, it can do so if installed near a western coastline, subject to driving rain. One growing problem though, is damp caused by existing cavity insulation becoming contaminated or disrupted during subsequent building work or repairs.
Insulation installers are regulated and have to check for debris before installation. They are also tasked with being diligent in installing to modern codes of practice. However, they have no control over what happens to the house once they leave. A good installation can work successfully without problems for years. Then suddenly there’s a damp problem.
Having cavity wall ties installed, an extension built, loft conversion or even a new boiler or extractor fan can lead to issues. All these operations can impact the insulation, if due diligence isn’t applied. Dirty and compressed insulation will draw moisture across the cavity – this is not the fault of the insulation or the insulation installer.
If you have insulation and are planning work, it is important to make sure that the contractor has taken this into account. If not, expensive trouble may be on the horizon and it can be difficult to apportion blame.
In closing I need to mention external ground levels. High paths and driveways can cause all sorts of problems. The most common is penetrating damp at the base of walls, though rising damp can also happen because of this. This can lead not only to disruption of the plaster and decorations, but also wet rot and dry rot in timbers near to them It can even lead to widespread decay in floor timbers if air bricks, designed to ventilate the below floor space, become blocked.
So things to look for include: air bricks embedded in the ground, or path levels at, or near internal ground floor level. The habit of some builders; laying new paths and drives on top of old ones, has kept damp specialist like me in business for years – watch out for this; the old drive should always be dug-up, not used as a foundation for a new one.
I hope I haven’t patronised anyone by keeping this so simple; it is the VERY basic guide. I hope it helps you.
Dry Rot.
Please let me know if you’re looking for a article author for your blog.
You have some really great articles and I think
I would be a good asset. If you ever want to take some of the load
off, I’d really like to write some material for your blog in exchange
for a link back to mine. Please send me an e-mail if interested.
Kudos!