Is it Rising Damp or just a plastering problem?
Most damp problems can be diagnosed with a good pair of eyes and some experience. However, sometimes problems can be more complex and even the most experienced need more information. One such situation is a rising damp profile or visible rising damp tide mark, where there shouldn’t be one…. what else could be happening?
You’ve checked for leaks, bridging, poor pointing and such… still no joy?
It’s time to get scientific about it.
In these cases obtaining an accurate moisture profile is a must and the gravimetric method is the only fast and practical way of doing this accurately.
There are chemical moisture meters like the ‘Speedy’,which uses carbide reagent to produce an accurate measure of total moisture, but this is slow and the sample is destroyed in the process, so larger samples are needed so that half the sample can be taken back to the lab/office for further analysis.
The best way is just to take a number of samples from a wall, starting at the foot and working well past the last sign of any problem. This will provide the data needed to help get to the damp problem.
With tutoring from my mentor Graham Coleman I have set up a gravimetric lab in my office for this purpose and it came in handy on damp survey in Harrogate, West Yorkshire recently.
The client was concerned about damp on a party wall. Both sides of the wall are accessible and it has had a history of damp problems. using an electronic conductivity meter a typical rising damp profile was obtained. However, the wall has a chemical DPC installed and the plaster has been replaced in the past so there were questions:
Is the damp continuing rising damp or is it due to salts which have not been addressed properly via the plastering system?
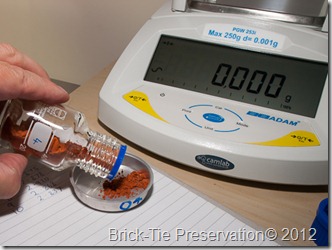
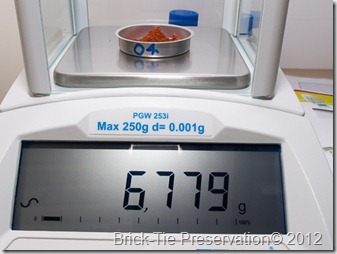
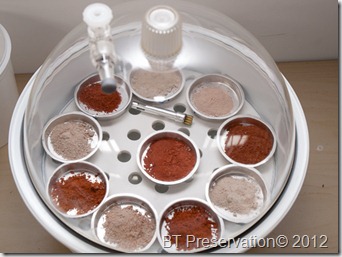
I took 5 vertical samples of the masonry and carefully weighed them to within one thousandths of a gram. These were then placed in a desiccator, though the desiccator was actually used as a humidifier. This is achieved by filling the base of it with a saturated solution of common salt (lab salt, not from the supermarket, which contains anti-caking agents which mess up the process). The samples were sealed in that environment for a few days and allowed to reach equilibrium with the relative humidity in the vessel. This is a constant 75% when common salt is used.
Of course, this means that the samples may have gained weight or lost weight, depending how much water they contained.
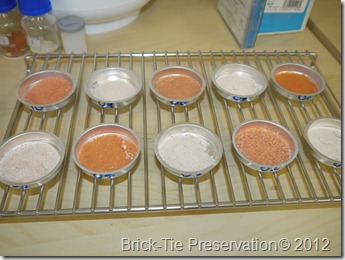
They are weighed again at this stage, before being dried overnight in a gentle oven (no more than 500C). A final weighing is taken to get the dry weight of the sample.
The reason for these three weights is that we want to separate out the water in the samples; which is due to hygroscopic salts, as opposed to water drawn into the wall via capillary action; ‘free’ water? An electronic moisture meter cannot differentiate between water from the ground and that which is due to the natural moisture capacity of the material. Some materials can hold quite a bit of water from the air and their ‘air dry’ moisture content, can be quite significant, especially in a humid environment.
Add some salts to the wall and this becomes even more of a problem, because many salts are hygroscopic and will actively pull in water vapour, even to the extent of causing a wall to look damp. In addition, these salts drive conductivity meters crazy, so readings can be very misleading. To make matters worse, rising damp will concentrate salts in a wall and in the plaster and despite the best damp proofing system, these remain and can cause issues later. This is why all ‘approved’ rising damp treatments include an element of re-plastering. This removes the problem of the remaining salts – if done correctly.
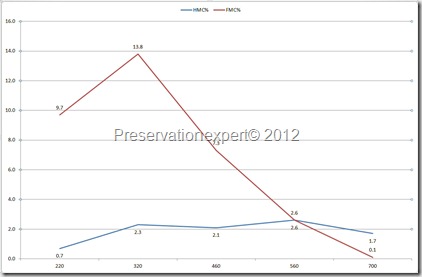
The above is the moisture profile with the hygroscopic moisture separated from the ‘free’ water.
This is a fairly typical rising damp profile with the free water tailing off with height, whilst the hygroscopic moisture tends to increase. There are other interpretations and this cannot on its own be used as the diagnosis, but it does help me enormously where a definitive diagnosis is either difficult or has lots riding upon it (in a dispute for instance).
The equations for the calculations are contained in BRE Digest 245 and are quite simple. The equipment is not expensive, apart from a good self calibrating balance, which will set you back a good five or seven hundred quid. I have a proper lab oven but I dare say you could use a domestic one if you set it to very low.. say de-frost.
One thing to bear in mind is that single samples can be very misleading. I’ve found that many profiles throw up one or two rogue readings, so a number of samples to form a profile is always the best bet. Also, don’t mix dissimilar materials in the same data set – use all plaster or all brick or all bed-joint.
Dry Rot.
Gravimetric testing is only part of the damp diagnosis process, use the tags to search for more relivant posts which may help you. You can also visit my commercial site, if you need my services search for Brick-Tie Preservation
Another interesting read, I want one 🙂
Hi Ross,
Thanks for looking in. I have some interesting case studies already and will write up a more detailed article later.
cheers
Bryan
Thanks for the latest post.
The use of highly accurate pieces of measuring equipment must really give your diagnoistic expertise an extra dimension.
Thanks for explaning the process.
George
Hi George,
How’s it going?
I’m delighted to have the new equipment and am spending too much time playing with it. It’s facinating to try to second guess what the profile will look like, following my ‘normal’ survey. So far it has validated my site opinions but it’s early days yet.
That reminds me, I forgot about the images of the gable you sent me – I will dig them out and take a look tonight.
regards
Bryan
It doesn’t matter how many books you read there is absolutely no better way to learn about something than to actaully buy the kit and start having a go!!
One of the Dad’s at my children’s school is a scientist in Mill Hill. I’ve given him a link to your blog to show him what you’ve been doing. He’s very interested.
This is perhaps another opportunity to demonstrate how sophisticated damp diagnosis has become.
If you lived closer to London, I’d pop around and take a look!
Hi Bryan,
Another great post, found this very interesting, I look forward to reading your other case studies when published.
Many Thanks Dave.
Hi Bryan,
Good site and good discussion.
Looking at the photos, your scientific 3 place balance seems to be sited on a kitchen unit / table which does not lend itself to very accurate results. I cant be sure of this as the photo on view is too close. I know you are looking at differences and not actual weights, but if the balance is not on a dedicated balance table then it wont work so well. Also, balances take a while to warm up to get best results. Ideally, they should be left on to get-up to room temperature. Ideally, the temp in the room should be isothermal. Keep the balance out of direct light and away from direct heat (rads) and the drying oven. Also, keep it away from draughty doors. The balance pan is protected quite well by a cover and doors, but the instrument is still prone. It is a good idea to check it against calibrated (certified) weights to ensure that it does what it says on the display. Modern balances inside have checks, but they are not certified.
I totally agree with the variability of samples. It is a bit like trying to measure a fruit cake. Do you get all fruit? or all nuts? Or all cake? This is a limitation of sampling error. The larger your samples the more representative of the cake (your sample) will be. Obviously you cant take such a big sample as the client will get upset as it is a destructive test.
Samples containing moisture should be well bagged up and sealed so as not to add or loose water on the way to the lab; and preferably analysed ASAP as moisture levels can change.
Last point, the sampling drill bit should not be allowed to get too hot as moisture will be lost during the sampling. I dont know what to do about the last point as all drill bits get hot.
What do you do about this to prevent?
Hi Ed,
Thank you for looking in and for your advice – always appreciated.
I’ve had the balance for quite some time now and am finding the sturdy table is sufficient. The results are quite consistent and when I re-measure things, like the sample trays and when I allow oven dried samples back into the chamber to re-hydrate, everything is restored to the former weights. I’m pleased with it and the self-calibration seems to work well. It even has a temperature monitor to confirm that it is ‘stable’ before a reading is confirmed.
Of course all samples are mixed and kept in air tight bottles before weighing. I am lucky as a contractor and have great equipment – my drill is a 16mm diameter rotary hammer so the sample is obtained very quickly – no time for any heating with one of these. Small percussion drills at high speed can be an issue as you say.
I’m glad you approve of my blog – it’s mainly written for laypersons but now and again I do write for students and professionals too.
best wishes Ed
Bryan
Very interesting. In my experience the only time this type of moisture analysis has been used is to determine if damp proof treatment has failed. The practicalities of obtaining several readings as suggested are of concern as are the steady state conditions both in the sample setting and the ‘lab’. One thing is clear, you are trying to provide as accurate a diagnosis as possible.
Thanks George,
I have to admit that it is an indulgence really. I get very few call-backs to faulty DPC installations and I don’t get involved in disputes, so I don’t actually need all this kit. I just wanted to explore the method and see if it shed any new light on my survey findings. In practice I have found it empowering because it shows that in fact the recommendations we make, using eyes and electronic moisture meters are sound – it’s all down to using the meters properly and having the surveying knowledge and experience to make a correct judgement.
Also, it’s one thing understanding the theory but when you go out in the field and do the work, this really helps to embed the knowledge in place.
best regards
Bryan
Great article Brian; it is so refreshing to see a true expert raising the issues of salt concentrations in walls following evaporation of soil water.
As ‘… electronic moisture meter cannot differentiate between water from the ground and that which is due to the natural moisture capacity of the material…’, does this mean the end for surveys using an electronic conductivity meter?
Salts are conductive and accordingly moisture meters may give misleading readings in respect of free-water, especially in the summer season when the soil may be parched and may not be conducive to generating capillary water movement from the ground.
This new diagnostic method must have cost implications for the service that you offer; however ‘… as obtaining an accurate moisture profile is a must and the gravimetric method is the only fast and practical way of doing this accurately …’, I believe it is a cost home owners would be prepared to meet.
Can you see this as being the new survey/ analysis system adopted by the damp proofing professional?
Hi Dave,
Thanks for looking in. Destructive damp testing will never become mainstream in my view; too costly for homeowners. However, it’s use will grow I think and it has its place for definitive damp diagnosis. I’ve found though, that gravimetric tests don’t usually result in a different diagnosis than that which is arrived at using an electronic meter. The main reason electronic meters are decried is the way they are misused to sell something or create fear. Some contractors will just use a meter to back-up a sales proposition and now I see the converse; independent damp surveyors using the fear of the electronic meter to justify an expensive and usually unessential carbide investigation – both sides are to be abhorred for this in equal measure. It is an ethical issue, rather than a fault of the meters themselves.
I am starting to compare more gravimetric results against electronic ones for a post in the future, but it will be some time before I have enough comparisons to make any useful sense.
best wishes
Bryan
Bryan,
Very nice case study.
Scientific approach gives the results, but I guess not all could afford the proper lab ovens and equipment especially if they only frequently review damp issues.
Look forward to reading your future posts on this subject.
Thank you for sharing, it is very much appreciated.
Gary
Thanks Gary,
It’s a bit easier as I am a contractor so buying a bit more kit is not that expensive in the scheme of things. I’ve found the process fascinating and in learning the ropes it has certainly honed my knowledge.
Bryan
Hi Jason,
Thank you for looking in. The gravimetric method will certainly show whether rising damp has dried down or is still active. If rising damp is still active there will be a profile and some ‘free’ water, high low down the wall and decreasing with height – as in this case. It is the lack of free water and the remaining hygroscopic moisture content at the profile for salts which would confirm that the damp is controlled or ‘historic’. Works every time and is very reliable.
Bryan
oh – the blue line plots the capillary moisture or ‘free’ water. The red line plots the hygroscopic moisture content.
Hi Jason,
Sorry for the delay – you were in a spam folder.
You need a copy of BRE245. This will explain the procedure for you.
You should be able to see that a historic rising damp problem, now dried-down would be easy demonstrate using this method. A historic rising damp problem would be a plot showing high hygroscopic moisture (blue line) and a low free water content (red line). In effect, no rising damp, but the legacy of it in the form of increased hygroscopic moisture – easy.
An active rising damp profile is shown above. Note that the capillary moisture is high at low level and reduces with height? Not so the hygroscopic MC%
best regards
Bryan